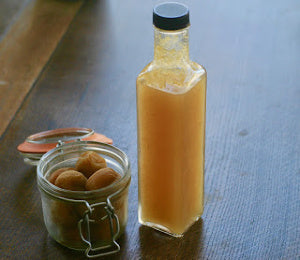
I've always thought that the making of umeboshi would involve some mysterious ritual that only dedicated afficionados of this fermented Japanese specialty could accomplish, but thanks to Nancy Singleton Hachisu's Preserving the Japaneses Way I discovered, to my surprise, that it's rather simple! No complicated ritual to accomplish. Just gentle handling of the plums (as it is very important not to bruise them) and some patience; as required with all fermented recipes. The bonus was that the beautiful, enchanting fragrance of ume filled my house for days during this process.
Nancy's recipe calls for drying the plums in the sun once they have fermented for about 2 - 3 weeks. However, as San Francisco gets foggy, I opted to use my dehydrator instead. Additionally, I had to add extra brine during the fermentation to ensure that all the plums were completely covered and submerged and safe from exposure to oxygen.
And to clarify, "ume" refers to the fresh plums, while "umeboshi" is the finished salted, dried and preserved product. There is also "umezuke" which are pickled plums that are not dried.
NOTE: The addition of shiso leaves will turn the plums a shade of dark pink which is added to most commercial brands, but it's totally fine to make them without shiso leaves, which is what Nancy does in her recipe.
The following recipe is adapted from Nancy Singleton Hachisu's book:
Preserving the Japanese Way
Ingredients
Note: You can easily scale this recipe up or down. The amount of salt should be 8% of the weight of the fruit. Using this formula, you can easily scale up OR down depending on how much ume you get when they are in season.
Method
1. Carefully place ume in a large bowl. And cover with cold water.
Allow to soak over night, then drain water.

2. Add the measured amount of sea salt and gently mix with you hands.
Again, be careful not to bruise the plums or to puncture the skin with your
fingernails.
3. Transfer the mixture into a quart, or 1/2 gallon wide-mouth mason jar
(depending on how many plums you have), and secure your Kraut Source parts
onto jar according to directions.

4. After 2 - 3 days, you will notice that the plums have soften and have lost about half their volume. And that a natural brine has formed in the jar. Most likely, there will not be enough brine to cover your plums. If that is the case. go to step #5.
5. Remove your Kraut Source parts, and top your fermenting plums with salt brine (one Tablespoon sea salt to one cup water) until they are covered by an inch over the top of the fruits. Place Kraut Source back on and allow to keep fermenting for about 3 weeks.

5. When ready, carefully drain the salt brine (and reserve it), and place your umes onto the trays of a dehydrator and dry at 95 degrees Fahrenheit for about 10 - 12 hours; until they shrink and the skin gets crinkly. Transfer umeboshi into air-tight glass containers and store in the fridge.
You can also take this a couple of steps further, and make Homemade Umeboshi Vinegar AND a creamy tangy dressing!
(See recipes below.)

To make Homemade Umeboshi Vinegar, take about 8 - 10 fermented plums and remove the pits. Place into a blender and add in about 1 cup of that reserved brine. Puree until smooth. Pour into a glass bottle, and store in the refrigerator.
Umeboshi and Honey Tahini Dressing
OR 3 - 4 umeboshi plums, pits removed
1.Place the first three ingredients in a blender and mix well.
2. With the blender going, slowing drizzle in the olive oil until a smooth and creamy dressing is formed.
3. Taste for flavor and add in extra salt and fresh pepper as needed.
(Don't add any salt until you've tasted it, as the umeboshi vinegar or plums are
already salty.)
Happy Fermenting!

Chief Fermentation Officer
Comments will be approved before showing up.